Do This Every April — Before June 1
Pre-storm season prep checklist for Gulf & Atlantic coastal homeowners
Atlantic hurricane season opens June 1 every year without exception. The window between April 1 and May 31 is when a prepared coastal homeowner can accomplish everything that matters — roof inspection, insurance review, documentation, supply stockpile, tree trimming, generator maintenance — without the pressure of a named storm bearing down. Every item on this checklist is harder, more expensive, and less effective if you're doing it with a storm already in the Gulf.
This is the complete annual checklist — organized by category, prioritized by impact, and written for the realities of coastal living across Florida, Texas, Louisiana, Mississippi, Alabama, Georgia, South Carolina, North Carolina, Virginia, Maryland, Delaware, New Jersey, and New York.
The Window That Matters
Why April–May is the only time this works
What happens if you wait
When a tropical system is named and tracking toward your coast, the following all become unavailable simultaneously: roofing contractors are booked solid — sometimes for weeks. Insurance policies can be bound or modified under a hurricane watch or warning moratorium. Tarps and plywood sell out at every hardware store within hours of a watch issuance. Tree services stop taking new work. Generator stocks are depleted. Fuel lines form at gas stations.
Everything on this checklist takes days to weeks to complete properly. The April window exists precisely because nothing on this list can be rushed without tradeoffs — and every tradeoff costs money, quality, or both.
The compound benefit of pre-season prep
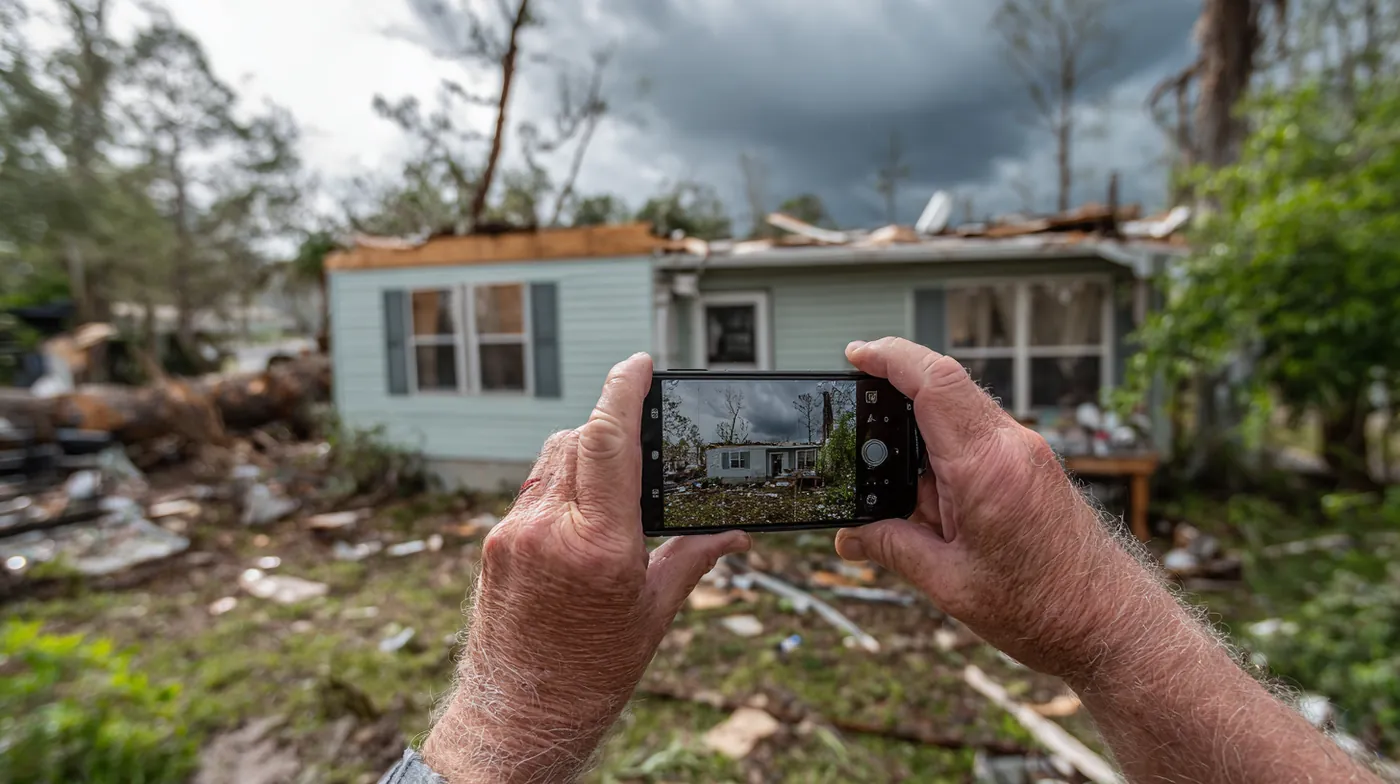
Pre-season preparation doesn't just reduce storm damage — it fundamentally changes your insurance claim experience if damage does occur. A homeowner with a documented pre-season roof inspection, a current home inventory, before-photos of every room, verified insurance coverage, and a stockpiled tarp gets paid faster and more fully than one without any of those things.
The insurer's job is to establish pre-storm condition and storm-caused damage. Your job is to make that process unambiguous. Every item on this checklist either reduces damage or makes your claim undeniable.
The 5-category framework
🏠
Roof & Structure
The primary line of defense against every storm
📋
Insurance & Docs
The paperwork that determines your recovery
📦
Supplies & Equipment
What you need and can't get after a storm
🌳
Property & Yard
What becomes a projectile if you don't act now
👨👩👧
Family & Plan
The decisions that can't wait until landfall
🏠 Category 1 — Roof & Structure
Roof and structure — your primary line of defense
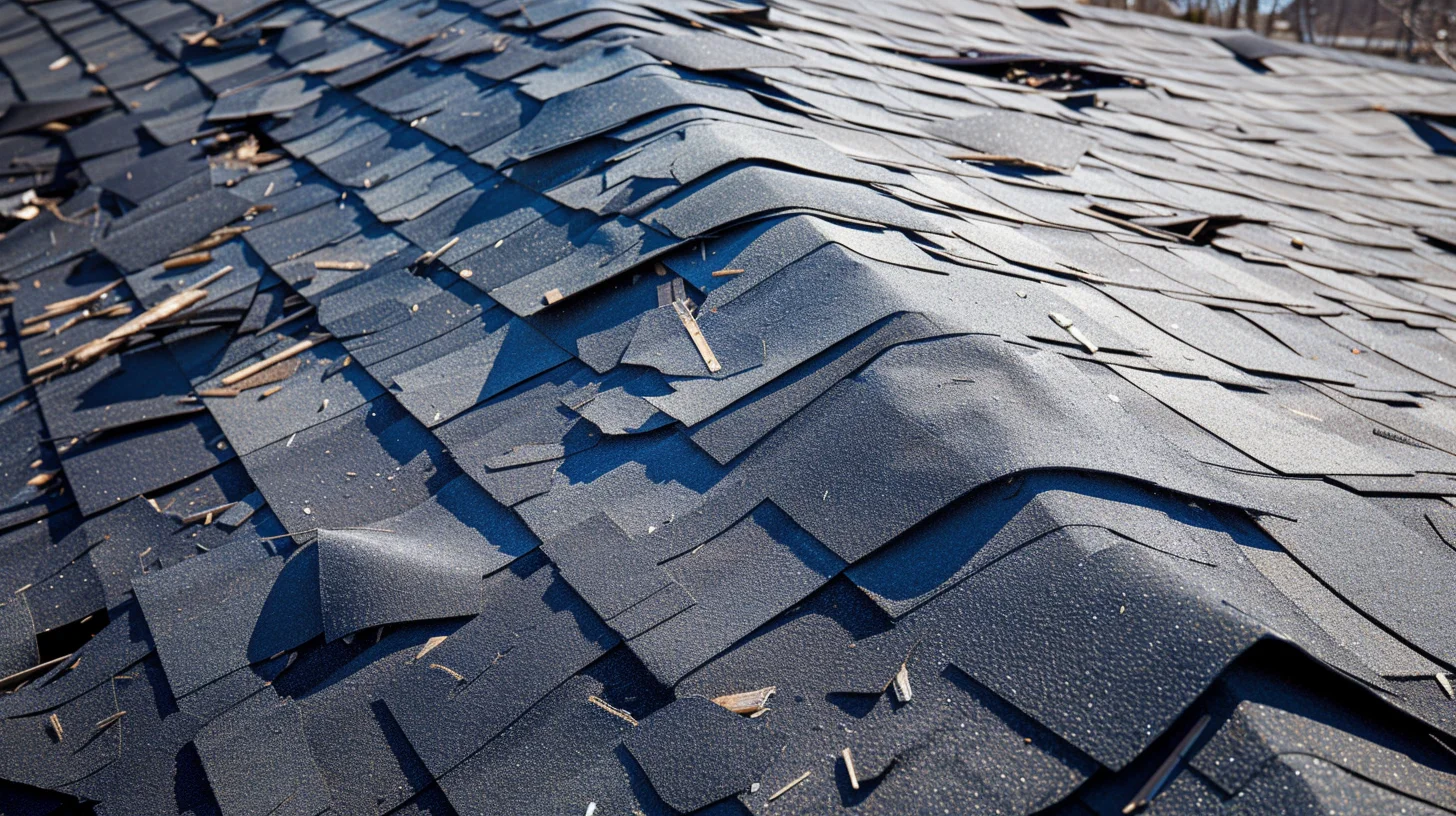
Your roof is the single most storm-vulnerable component of your home and the source of the majority of storm insurance claims on the Gulf and Atlantic coast. A 30-minute pre-season inspection by a licensed roofer reveals problems — missing flashing, cracked caulk, deteriorated pipe boots, lifted shingles — that cost hundreds to fix in April and thousands to fix after they've allowed water intrusion during a storm.
☐
Schedule a professional roof inspection — before June 1A licensed roofer on your roof for 30 minutes is the highest-value item on this entire checklist. They will find things you cannot see from the ground: lifted nail heads, cracked pipe boot collars, failed ridge cap adhesive, step flashing separations, and granule loss patterns that indicate areas of accelerated shingle wear. Get the inspection in writing — that written report is your pre-storm condition baseline for any post-storm claim dispute. Request us for a free inspection →
stormroofquotes.com
Roof checklist — what to verify or have inspected
☐
All flashing inspected and re-sealed if needed — chimney flashing, valley flashing, step flashing along walls, and pipe boots are the most common water entry points. Caulk and sealant at these points degrades annually in coastal UV and heat. Re-seal anything that shows cracking or separation.
☐
Ridge cap inspected — ridge caps are the first shingles to fail in high winds. Any that are cracked, curling, or showing nail pop-through need to be replaced before storm season.
☐
Gutters cleaned and secured — clogged gutters cause water to back up under the eave, rotting fascia and eventually the roof deck. Check every downspout runs clear. Confirm gutter hangers are secure — a gutter full of water and debris can pull away from the fascia in high winds, damaging the eave and becoming a projectile.
☐
Attic inspection — look for daylight, moisture, and mold — go into your attic in April and take photos. Any daylight visible through the roof deck is an active vulnerability. Any moisture staining or mold on the decking or rafters needs to be addressed before storm season adds more water.
☐
Soffit and fascia secure and intact — damaged or loose soffit panels are a major wind vulnerability. Wind gets under loose soffit, pressurizes the attic, and lifts the roof from the inside — a mechanism responsible for significant roofing losses in every major Gulf storm.
☐
Know your roof age and material — insurance adjusters use roof age to calculate depreciation. A 20-year-old asphalt shingle roof hit by a storm may be considered at or near end of useful life — affecting your ACV payout significantly. If your roof is 15+ years old, this is the year to seriously consider replacement before storm season rather than after.
Exterior structure checklist
☐
Windows and doors — inspect seals and hardware — storm-driven rain gets into homes through window and door seals long before wind causes structural failure. Re-caulk any gaps around window and door frames. Confirm all exterior door locks, deadbolts, and hinges are fully functional. Storm shutters or impact windows should be inspected and tested now — not when a watch is issued.
☐
Garage door bracing — garage doors are the largest and most wind-vulnerable opening on most homes. An unbraced garage door failure allows wind to pressurize the entire structure. If your garage door is not rated for your local wind zone, a vertical brace kit ($50–$150) is one of the most cost-effective storm hardening steps available.
☐
Foundation and slab drainage — confirm all foundation vents are screened and unobstructed. Check that soil grading around the foundation slopes away from the home — standing water against the foundation after a storm accelerates moisture intrusion.
☐
Pool screen enclosure — pool enclosures are expensive to replace and create significant wind resistance. Inspect all screen panels for tears. Confirm all frame connections are tight. Consider whether removing panels before a major storm is practical — a screened enclosure with torn panels in high winds creates additional structural load.
📋 Category 2 — Insurance & Documentation
Free — No Obligation
Get a licensed roofer to inspect your roof
One request. Up to 3 free estimates from licensed local contractors. Takes under a minute.
Insurance review and documentation — do this before any storm is named
Insurance companies impose a moratorium on policy changes once a storm watch or warning is issued for your area — sometimes earlier. You cannot increase coverage, change deductibles, or bind new policies once a storm is threatening. The April window is your only reliable opportunity to make sure your coverage matches reality.
☐
Pull your declarations page and read it — your Coverage A (dwelling), Coverage B (other structures), Coverage C (personal property), Coverage D (ALE), and your hurricane deductible. Most homeowners haven't read their declarations page since closing. Know your numbers before the season, not during a claim.
☐
Calculate your hurricane deductible in dollars — most coastal policies have a percentage-based hurricane deductible, not a flat dollar amount. 2% of $350,000 Coverage A is $7,000 you pay before insurance pays anything. Know that number. It determines whether the SBA disaster loan makes sense for you and how much cash reserves to maintain.
☐
Verify Coverage A reflects current rebuild cost — construction costs on the Gulf and Atlantic coast have risen dramatically since 2020. If your Coverage A was set years ago, you may be significantly underinsured. Ask your insurer for a current replacement cost estimate. The gap between your Coverage A and the actual cost to rebuild is your financial exposure in a total loss.
☐
Confirm ACV vs. RCV on your roof — Actual Cash Value policies depreciate your roof's value before paying. A 15-year-old roof on an ACV policy might net you 30 cents on the dollar after depreciation. Replacement Cost Value policies pay what it costs to replace the roof today. Check your declarations and upgrade to RCV if you have ACV — the premium difference is typically small compared to the payout difference.
☐
Verify flood coverage — separate from homeowner's — standard homeowner's policies do not cover flood. If you are in a FEMA flood zone — or even near one — and don't have separate flood coverage (NFIP or private), you have no protection from storm surge. One storm surge event with no flood policy is a financial catastrophe. Buy flood coverage now; there is typically a 30-day waiting period before it takes effect.
☐
Check windstorm coverage if you have a separate windstorm policy — in some coastal markets (Texas coast, parts of Florida and the Carolinas) windstorm coverage is written separately from your homeowner's policy. Confirm both policies are current, both name the correct lienholder, and both have the same effective dates.
☐
Ask about wind mitigation inspection discount — in Florida especially, a licensed wind mitigation inspection can reduce your windstorm premium by 20–45%. The inspection costs $75–$150 and takes 45 minutes. The insurer must accept a valid wind mitigation report. If you've made any roof or opening protection improvements in the past few years, an updated inspection can significantly reduce your premium. Ask your agent every April.
☐
Complete your pre-storm photo documentation — every room, ceiling to floor. Exterior all four sides. Roof from the ground at multiple angles. All serial numbers for appliances and electronics. Attic interior. See the
full pre-storm documentation guide →
☐
Complete or update your home inventory — every major appliance, electronic, piece of furniture, jewelry item, and high-value collectible with serial numbers, purchase dates, and approximate replacement values. See the
home inventory checklist →
☐
Save insurance documents to cloud storage — declarations page, full policy, insurer contact and claims number, agent name and direct phone. Keep this in the same cloud folder as your pre-storm photos. After a storm, you will need both simultaneously.
☐
Confirm your mortgage lender is correctly listed on your policy — if you've refinanced, sold, or your servicer has changed, the mortgagee on your policy must match your current lender. A mismatch can cause delays in claims processing. Call your insurer and verify the mortgagee name and address is current. See the
mortgage and escrow guide → for why this matters.
📦 Category 3 — Supplies & Equipment
Supplies and equipment — buy now, before the shelves are empty
After a hurricane watch is issued, the following items reliably sell out at every hardware and home goods store in the affected area within hours: tarps, plywood, generators, fuel containers, batteries, and water. None of these items are more expensive in April. All of them are unavailable or 3x the price when you actually need them. The cost of stockpiling is trivial compared to the cost of improvising under storm pressure.
🚨 Storm protection supplies
☐
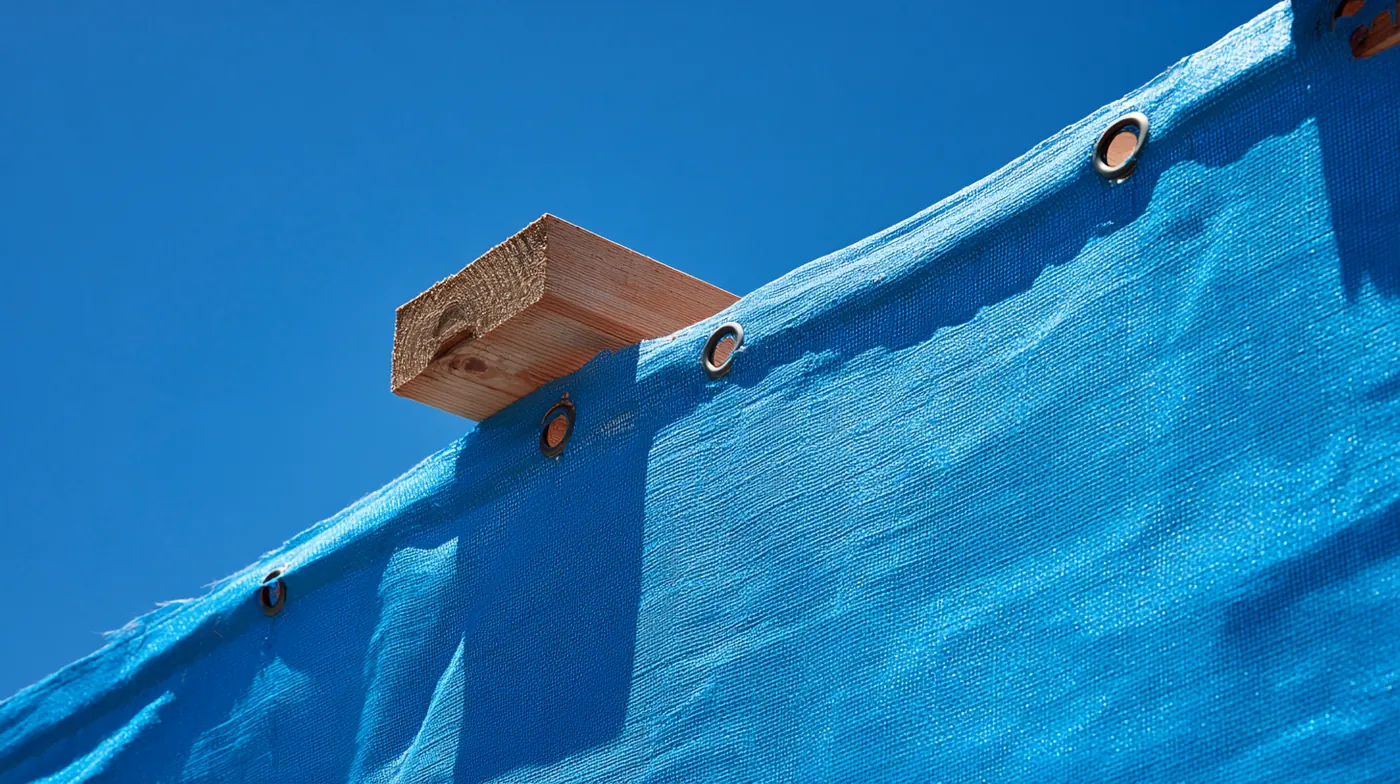
Billboard vinyl tarp — sized to your roof — 20×30 for single-story, 30×50 for larger homes. Store in a contractor bag. This is the one item that stops a roof damage event from becoming a total loss. See why billboard vinyl outlasts blue poly by years in the
emergency tarp guide →
☐
2×4 boards (8) and 3-inch exterior screws — the hardware to secure the tarp. Pre-cut and stored flat. Without these, a tarp in high winds is useless.
☐
Plywood for window protection if no shutters — ⅝-inch CDX plywood, pre-cut to fit each window, labeled, and stored. Pre-drilling mounting holes in April means a 2-hour job the day before landfall instead of a 6-hour panic.
☐
Hurricane shutters — inspect and test operation — if you have accordion, panel, or roll-down shutters, test every one now. Stuck tracks, broken latches, and missing hardware are common after a year of disuse.
☐
Sandbags (10–20) for flood-prone areas — if your property has low areas that take on water, having sandbags pre-filled and ready is the only way to deploy them effectively. You cannot fill sandbags during a flood.
☐
Fuel — 20–30 gallons stored with fuel stabilizer — enough for 72 hours of cycling operation. Rotate annually. Store in a detached shed, not in an attached garage.
☐
CO detectors — replace batteries, test all units — every detector in the house. CO detectors have a 5–7 year lifespan; replace any that are older or chirping.
☐
Dehumidifier — confirm it works and is clean — your first line of defense against mold after water intrusion. A clogged filter or frozen coil means it runs but doesn't dehumidify.
☐
Battery fans (2 minimum), fully charged — essential if power is out and humidity is high. High-capacity models run 8–12 hours per charge. Keep them charged from June through November.
☐
Prescription medications — 30-day supply minimum — pharmacies close for days after major storms. Arrange for a 90-day supply if your insurer allows it. Keep a written list of all medications, dosages, and prescribing doctors in your go-bag.
☐
First aid kit — fully stocked and current — check expiration dates on medications and replace anything expired. Add: waterproof bandages, irrigation syringe for wounds, SAM splint, tourniquets.
☐
Medical equipment backup power confirmed — CPAP, oxygen concentrator, dialysis, insulin refrigeration. Contact your medical equipment supplier now about backup power options. Register with your local utility as a medical-necessity customer — many utilities prioritize restoration for registered medical accounts.
☐
N95 masks, rubber gloves, eye protection — for post-storm cleanup in a water-damaged environment. Mold remediation without respiratory protection is a serious health risk especially for vulnerable household members.
🥫 Food, water, and essentials
☐
Water — 1 gallon per person per day, 7-day minimum — for a family of 4: 28 gallons minimum. Include water for pets. Store in food-safe containers away from direct sun. Rotate annually.
☐
Non-perishable food — 7-day supply minimum — that requires no refrigeration and minimal preparation. Include a manual can opener. A camp stove for cooking — not a gas stove, which requires utility gas that may be shut off.
☐
Cash — $300–$500 in small bills — ATMs and card readers don't work without power. Post-storm, cash is the only currency. Small bills for situations where vendors can't make change.
☐
Important documents — waterproof container or cloud — passports, birth certificates, Social Security cards, vehicle titles, deed, mortgage documents. In a waterproof container in your go-bag, and/or scanned to cloud storage.
🌳 Category 4 — Property & Yard
Property and yard — what becomes a projectile if you don't act now
Hurricane and tropical storm winds turn ordinary yard objects — furniture, branches, planters, decorations — into high-velocity projectiles. Pre-season yard work eliminates the hazards that can't be quickly removed the day before a storm. Trees especially: trimming and inspection work that takes a tree service a few hours in April cannot be done in the 24 hours before landfall when every tree company is booked.
Tree and vegetation checklist
☐
Have a certified arborist assess all large trees near the structure — particularly any with dead limbs, visible root damage, lean toward the house, or previous storm damage. A $150 arborist consultation in April is a fraction of the cost of the neighbor tree claim process described in the
neighbor's tree guide →
☐
Trim all branches within 10 feet of the roof line — overhanging branches scrape shingles in every storm, deposit moisture-trapping debris, and provide direct impact paths to the roof. Trim them back annually.
☐
Remove dead trees proactively — a dead tree near your home is a liability that grows with every storm season. Remove it now. Document removal with dated photos — this eliminates any future negligence argument if a portion of that tree remains and fails in a later storm.
☐
Write to neighbors with hazardous trees — certified mail — if you have a neighbor with a tree that genuinely concerns you, a written letter via certified mail to their address creates the documented prior notice required for a future negligence claim. Keep a copy. This is the step most people skip that costs them their deductible.
☐
Clear gutters of debris accumulated over winter — clogged gutters overflow in heavy rain, sending water against the foundation and fascia. Clear them in April, again in September if significant leaf fall has occurred.
Yard and exterior checklist
☐
Identify and plan storage for all outdoor furniture — know where every piece of outdoor furniture, grill, planter, umbrella, and decoration will go when a storm approaches. The day before a storm is not the time to figure out that the patio furniture doesn't fit in the garage.
☐
Secure or anchor items that can't be stored — built-in grills, heavy planters, and fixed outdoor furniture can be secured with hurricane straps or chains. Do it now so the hardware is in place.
☐
Check all fencing — replace any failing sections — a fence section that fails in high winds doesn't just damage itself. It hits adjacent structures, vehicles, and neighboring properties. Fix loose posts and failing sections now when contractors are available.
☐
Photograph your yard, fence, and all outdoor structures — these are the items most commonly disputed in storm claims as "pre-existing damage." Before-photos are your proof of condition.
👨👩👧 Category 5 — Family Plan & Evacuation
Family plan and evacuation — the decisions you cannot make in 12 hours
Evacuation decisions made under pressure in the 12 hours before landfall are consistently worse than decisions made in April with no storm in sight. The families who shelter in place who shouldn't are almost always the ones who hadn't made a clear decision in advance about their threshold for evacuation.
Family communication plan
☐
Designate an out-of-area contact — a family member or friend outside your hurricane zone who serves as the communication hub. Everyone checks in with this person, not each other — local cell networks collapse after storms but long-distance calls often go through when local ones don't.
☐
Every household member has the contact list memorized or written — phone batteries die, phones are lost. Memorize or write on paper: the out-of-area contact, your meeting place, your evacuation destination, your insurer's claims number.
☐
Know your county's evacuation zones — every county in your 13-state area has designated evacuation zones (A through E in most states, 1 through 5 in others). Know your zone. Know which category storm triggers mandatory evacuation for your zone. This information is at your county emergency management website — find it now.
☐
Register special needs household members with your county — elderly, disabled, or medically dependent household members may qualify for priority evacuation assistance. Registration must happen before storm season — most counties close their special needs registry when a storm threatens.
☐
Decide your evacuation threshold now — in writing — "We evacuate if our zone is under mandatory order" or "We evacuate for any Category 2 or above within 200 miles." Write it down. Post it. When a storm is forming, you reference the plan instead of arguing about it.
☐
Book a hotel now — or identify one you'll call first — hotel rooms within 300 miles of major coastal metros sell out 48–72 hours before projected landfall. A standing reservation with a known cancellation policy, or a clear "first call" hotel, eliminates a panicked search at 2 AM the night before a storm.
☐
Map two evacuation routes — traffic on primary evacuation routes can turn a 3-hour drive into an 8-hour one. Know your alternate. Drive it at least once so you know it's viable for your vehicle.
☐
Pet plan confirmed — most emergency shelters do not accept pets. Identify pet-friendly hotels on your evacuation routes. Know your vet's emergency number. Ensure carriers, food, medication, and vaccination records are ready to grab.
Put It on the Calendar
The pre-season prep timeline — April through May
April 1–7
Schedule your roof inspection and tree assessment. Pull your insurance declarations page. Start your pre-storm photo documentation. Test your generator. Replace CO detector batteries.
April 8–14
Have the roof inspection done. Engage a tree service for any required trimming or removal. Call your insurer about Coverage A adequacy, ACV vs RCV, and wind mitigation inspection. Buy tarps, boards, and screws if not already stocked.
April 15–21
Complete insurance changes while still well ahead of any moratorium. Finish photo documentation. Update home inventory. Store fuel with stabilizer. Address any roof repairs identified in inspection.
April 22–30
Tree work completed. Water and food supplies stocked and rotated. Medical equipment backup power confirmed. Send any neighbor tree notification letters via certified mail. Pre-cut plywood for windows if needed.
May 1–15
Family plan review with all household members. Evacuation threshold decision confirmed and written. Evacuation routes mapped. Pet plan confirmed. Hotel contacts identified. Special needs registration completed.
May 16–31
Final review of all checklist items. Everything stored, documented, and confirmed. June 1 arrives and you are prepared. Track the tropics at nhc.noaa.gov — the National Hurricane Center — beginning June 1.
Common Questions
Pre-season prep — questions coastal homeowners ask
How early is too early to start pre-season prep?
There is no such thing as too early. March is fine. The April–May window is simply the practical sweet spot — late enough that winter weather that could damage fresh caulk is over, early enough that contractor availability and supply stocks are normal. If you can do your roof inspection in March, do it in March.
Can I change my insurance coverage once a storm is named?
Generally no. Most insurers impose a binding moratorium — meaning they will not issue new policies or make changes to existing policies — once a hurricane watch or warning is issued for your area. Some impose moratoriums earlier, as soon as a tropical system is named or reaches tropical storm strength. The moratorium can last until the storm dissipates. Any coverage gap you discover after a storm is named cannot be corrected until after it passes.
I rent my home. Does any of this apply to me?
Much of it does. The supplies, equipment, family plan, and evacuation sections apply fully regardless of whether you rent or own. For insurance: your landlord's policy covers the building but not your personal property — renter's insurance covers your belongings and is inexpensive. The documentation and home inventory sections apply to your personal property specifically. The roof inspection and structural items are your landlord's responsibility — but you can and should notify your landlord of any visible concerns in writing.
How much does a pre-season roof inspection cost?
Through StormRoofQuotes, a pre-season roof inspection is free — our licensed contractor network provides these as a no-obligation service. Independent roof inspections typically run $150–$300. A wind mitigation inspection (which generates a formal report your insurer must accept) runs $75–$150 in most markets and pays for itself many times over in premium reductions.
What if I can't afford to fix everything I find in the inspection?
Prioritize by risk. The highest-priority repairs are anything that creates a water entry point — damaged flashing, failed pipe boots, exposed deck from missing shingles — because water intrusion after a storm causes damage that cascades into mold, structural, and electrical problems. Lower-priority issues like granule loss or minor weathering can be documented for your records but don't necessarily need immediate repair. A written inspector's report helps you make that prioritization rationally rather than reactively.
Complete Prep & Recovery Guides
Step One of Pre-Season Prep
Get a free pre-season roof inspection
A licensed roofer documents your roof's current condition in writing — the before-storm baseline your insurance claim will stand on. Free, no obligation, across all 13 coastal states.
Request Free Inspection →